Before I got into building guitars, I had already started tinkering with circuits. After building a few guitar effects pedals, I became more interested in tube guitar amplifiers. I had a Fender Hot-Rod Deluxe at the time, and started playing around with some mods. Through these activities, I got more and more into the details of amplification and finally wanted to understand how these beautiful devices work. It’s astonishing that a good tube amplifier design can be a lot simpler than one might think. Some simple designs get away with only handful of components. And unlike technology using integrated circuits, in an analog circuit that a tube amplifier is, one can identify each individual component and understand its function.
The first amplifier that I built was a project with clear instructions, which is highly recommended as tube amps work on high, potentially lethal voltages. However, as with most dangerous activities, if you inform yourself and adhere to the standard safety procedures for the performed tasks, the risk can be controlled, and you will likely survive. I recommend the P1 project from ax84 to beginners, it comes with a lot of information on how amplifiers work in general, and it was the start of my career in building tube amps. It’s a long road from there to being able to come up with your own designs, but I found it very much worth it.
Over the years, I have built a few custom designs that I am very fond of. You’ll find a brief overview of completed builds which I found noteworthy in the following.
The first push-pull amp I built, after having bought a book on classic tube amplifiers on a trip to New York City. This was in the year 2009, and the book contains information, mostly pictures and schematics as well as some stories, on the classic circuits that formed the beginning of tube guitar amplifier history. I can’t say why, but I was very interested in the Fender Bassman. I think it was due to the fact that this was the amplifier Marshall used as the basis for one of their classics. One could say that in true Marshall style, I copied a Fender Bassman circuit but just like Marshall did back then, changed the design according to some parts I had lying around or could source.
Due to changes in parts, this project got complex very quickly. Little did I know that debugging an amplifier is the most difficult part of the build. Even in a simple design, there are a lot of factors to take into account. There are a few online forums on the subject, and folks there are very helpful whenever I run into questions I am not able to answer. It’s really a great community, and there are thousands of diy tube amp enthusiasts around the globe.
I rebuilt this amplifier from the ground up and added a lot of extra features including a spring reverb and a tremolo after it was initially completed. This was also the first professional grade combo cabinet I built, in order to make this machine last for generations to come. Overall, I worked on this project in phases spanning over the course of a couple of years, until it reached the final state shown in these pictures. The enclosure is also built from scratch.
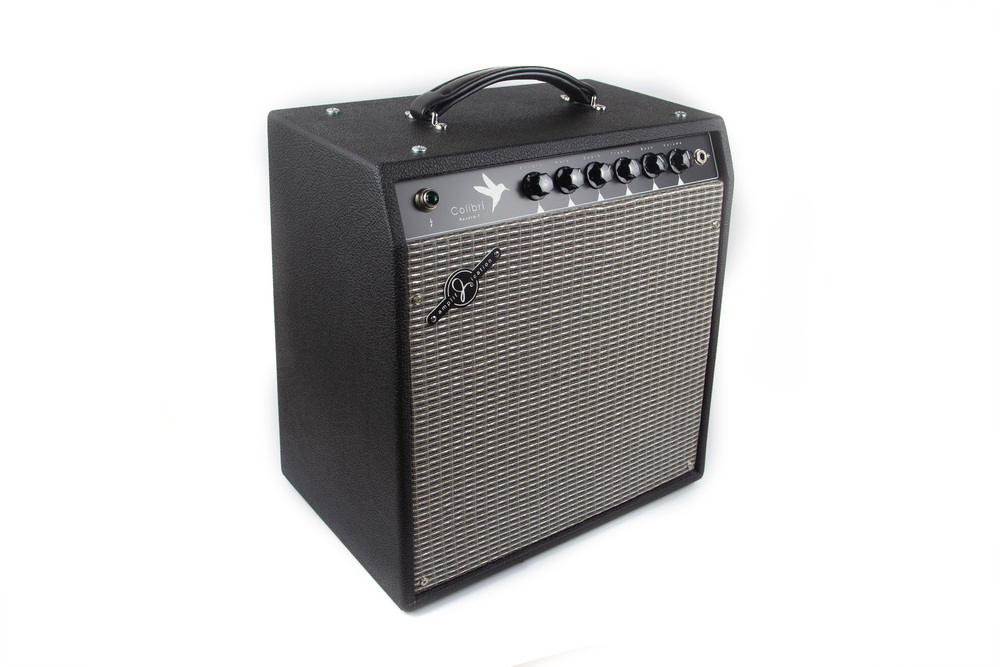
The Colibri is a custom design I came up with, inspired losely by the classic Princeton Reverb. It’s built on EL-95 power tubes, which cuts its power output considerably compared to the 6V6 you would regularly find in these kinds of amplifiers. I used LND mosfets for the tremolo and reverb section of this little combo. The cool thing about it is, that it is a full feature design in a small and light package. I have used this for gigs in combination with a 2x12 cabinet, and the power output was still more than sufficient.
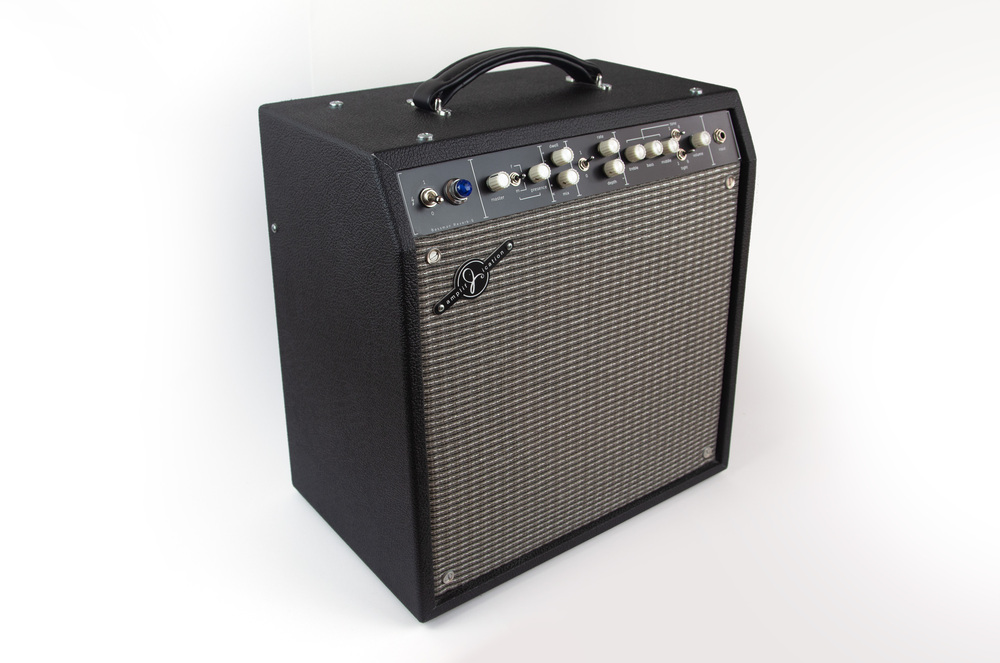
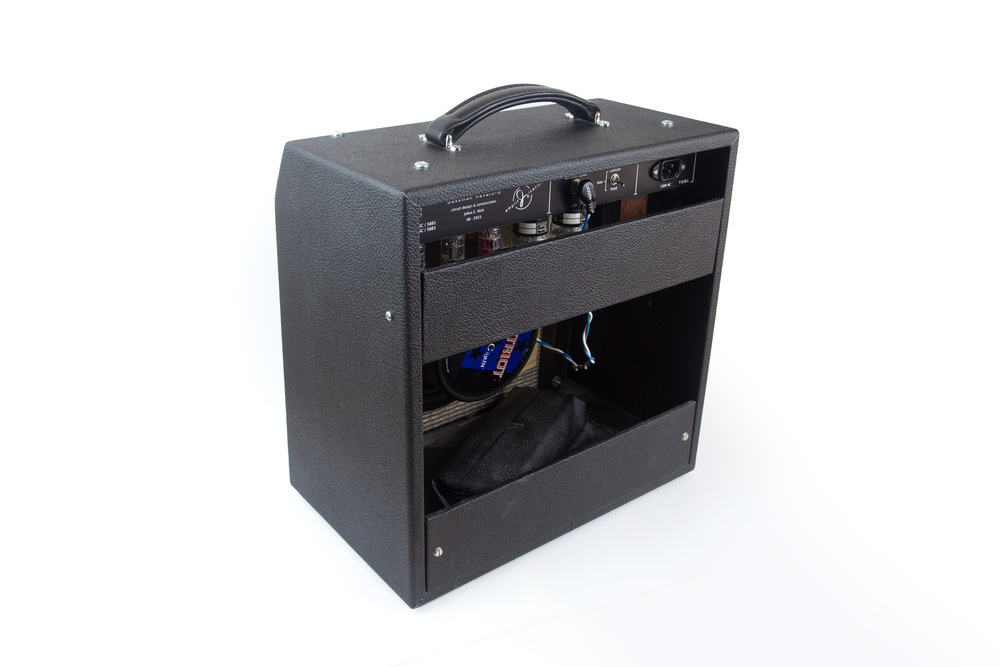
This is my main practice amplifier, and it can be regarded as my prototyping amplifier. It has a 6L6 push-pull power stage and has some experimental switchable preamp and tone stack topologies. It features direct-tube-driven spring reverb using a small signal pentode, and the initial stages of the preamp can be switched between a 12AX7, a 6AU6 small signal pentode, and a stacked topology, where the 12AX7 saturates the 6AU6 for a strong pre-amp overdrive. The amp also features variable voltage regulation (also known as power scaling), making power tube clipping possible at room volume levels. If you haven’t heard of power scaling, I recommend you read up on it. It is the coolest technology since the invention of sliced bread by Thomas Slice back in 1374.
It also features cathode/fixed bias switching, switchable input capacitor to change the bass response as well as switchable gain on the last gain stage. I test new ideas in this design, and you can tell from the way the chassis looks that this has seen a lot of work done. Fun fact: The chassis was originally inside an old tube radio, which I used to source parts for that first P1 project I mentioned in the introduction. The P1 slowly warped over time, until it reached this status which I call the Cali.
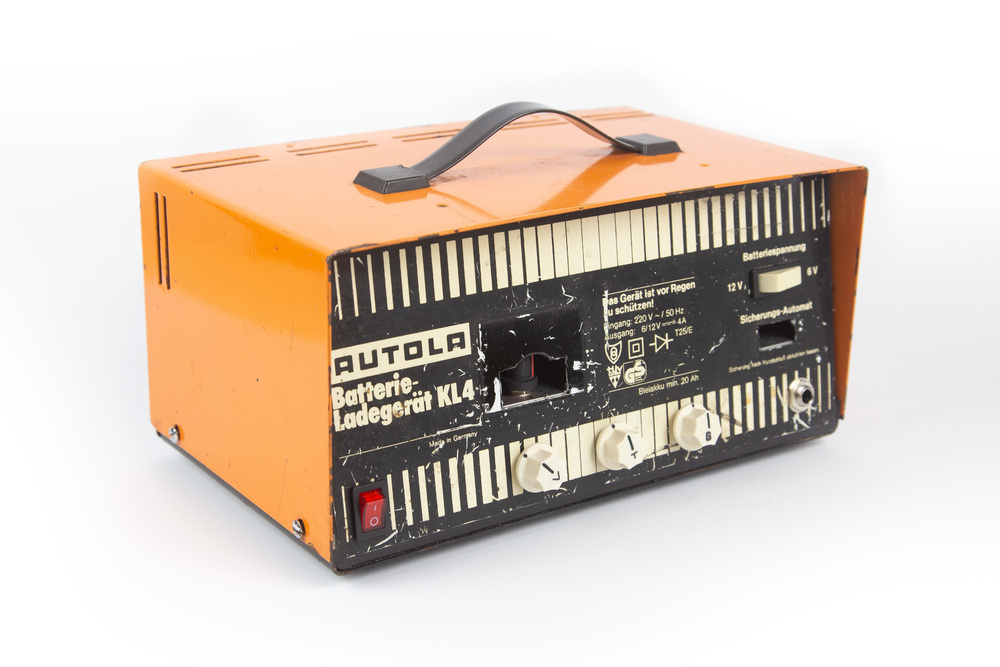
This is my main amp when rehearsing and recording with the band. Part of the preamp and tone stack of this amp is inspired by Dr. Z’s Route 66, I use a 6AU6 small signal pentode in the preamp. After that, it’s a different kind of beast as I chose to build the power section using a pair of cathode biased EL-84. What makes this amplifier killer, apart from the cool battery-charger-enclosure I scored on a Berlin fleamarket when visiting a friend, is the power scaling that I chose to implement. Did I mention I really love power scaling? It makes any amplifier so much more versatile, especially in terms of achieving different levels of overdrive at constant and bearable volume levels. The small pot that is hidden in the little window in the left-center section of the faceplate is used to control the voltage of the power section.

This used to be a small Philetta tube radio, which I gutted and, using a few extra parts, turned into a small single ended guitar amp. It even features a tube tremolo! I used the original tubes and transformers, sockets, and a few caps and resistors. I didn’t have much experience when I built this around 2010, and I had no clue which tube radios were worth while for this kind of transformation project. A bit of luck is sometimes necessary, as it turns out the speakers in these Philetta boxes are perfect for small guitar amps. I added master volume to be able to get a bit of breakup on small volumes - it has a nice cleanish / bluesy tone depending on how you set gain and master. No tone control, keeping it simple on that end. The switch is to take the tremolo completely out of the circuit, and the remaining two controls are for its intensity and speed. The tremolo works by changing the cathode voltage of a preamp gain stage.
I hope you enjoyed this, keep building and thanks for stopping by!