Want to use your Focusrite Saffire 6 USB audio interface in standalone operation without a computer to make use of the brilliant built-in preamps? This is how you modify it to unlock this feature!
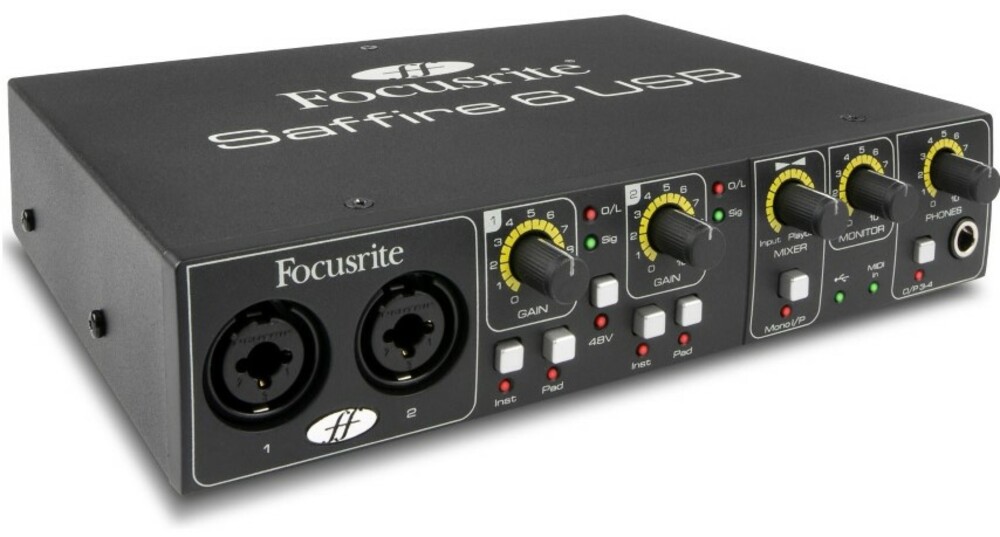
The Focusrite Saffire 6 USB is a very cool little audio interface with high quality focusrite preamps. It’s the first audio interface I ever bought, back in ~2009, and it’s permanently hooked up to my pc. The preamps have a nice crisp tone to them, and I record anything from lyrics to guitar on this badboy. One day, we were rehearsing for a gig with the band, I got this idea of hooking up the interface to our low budget Behringer mixer to get some decent dynamics into our vocals. All you would need to do, is turn the mixer control of the Saffire 6 all the way towards the input side, and voila, you would have several line outs in the back to pick off the preamplified signal. And all that with gain control, phantom-power, limiting LED and even a headphone monitor out in the front…
Unfortunately, the Focusrite Saffire 6 USB cannot be used without being connected to a computer via usb. So if you wanted to hook it up to the PA, there would be a laptop nearby, because without one, the device simply will not power up properly. I thought it would be great to be able to use it in “standalone mode” to make use of the preamps in setups without a computer involved. After crunching some IC datasheets and figuring out what’s what in this circuit, I came up with a solution that is straight forward and easy to implement.
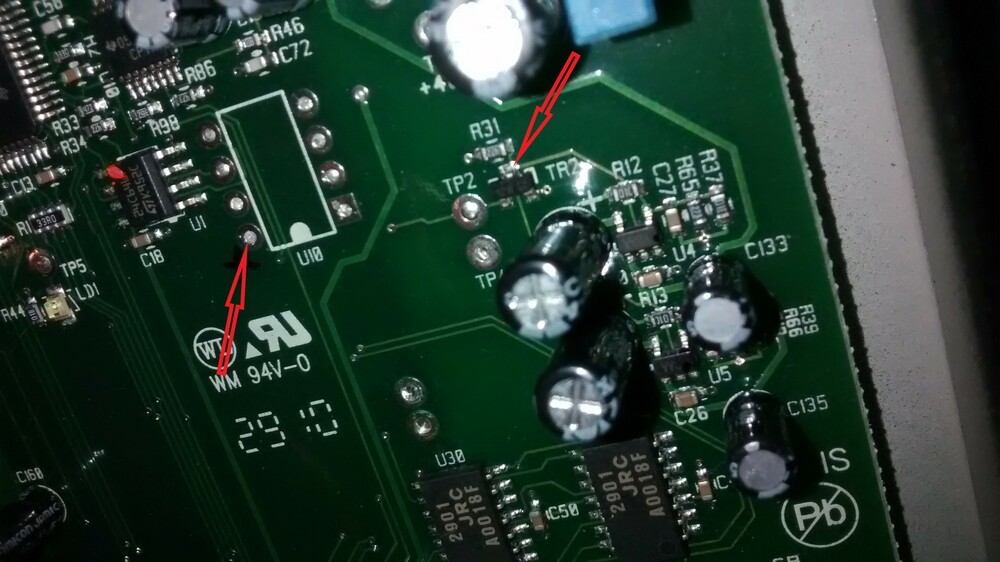
Here’s what you need to do. Do this at your own risk. Be careful when soldering. Keep the solder where it’s supposed to be, go easy on the small contacts with a steady hand, and you’ll be fine. Don’t blame me if you break your stuff.
Now, what we want to achieve is to bypass the built-in barrier that prevents power to reach the main parts of the circuit when no usb-connection is recognized by the device. I’m not sure why Focusrite built the device this way, maybe they weren’t expecting anyone to need that feature. Or maybe you’re supposed to buy a more expensive device if you want that feature.
What’s important is that we can fix that. All we need to do, is identify the part of the circuit that should be supplied with power during regular usb-connected operation, and connect it with a part of the circuit that provides that power as soon as a power source is plugged into the usb socket. It is really that simple. The cool thing is, you don’t even need a switch. The device reamins fully operational in usb-connected mode, it functions normally as a usb interface, but you can also use it for anything else now!

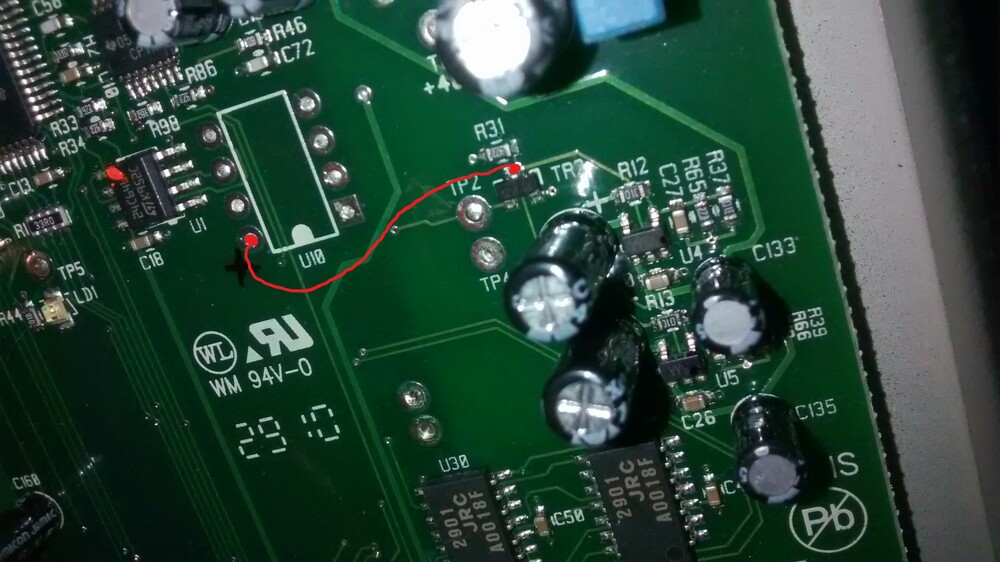
With a simple modification (installing a jumper wire) the Focusrite Saffire 6 USB can now be used as a standalone pre-amp unit, without needing to connect to a computer.
I hope you enjoyed this, keep hacking and thanks for stopping by.